Building Your First Gaming PC: A Step-by-Step Guide
A complete walkthrough for beginners.

Zero Logic Space
Hardware & Devices Zone
PC Building & Component Guides
SHARE
Building Your First Gaming PC: A Step-by-Step Guide
From Components to Gaming Powerhouse
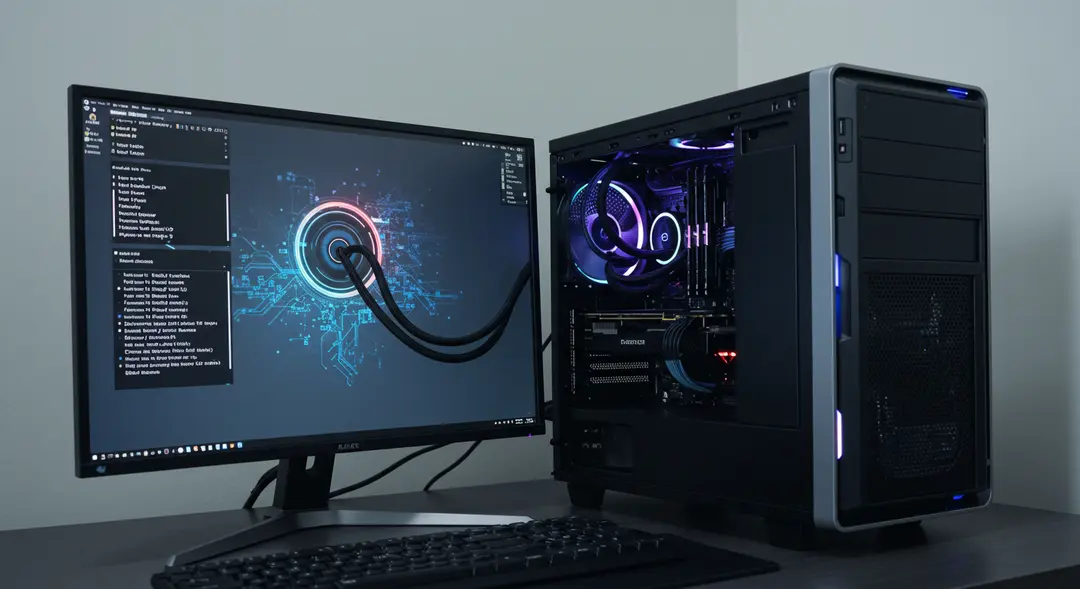
The world of PC gaming offers unparalleled performance, customization, and a vast library of titles. While pre-built gaming PCs offer convenience, building your own rig is a rewarding experience that can save you money, teach you valuable skills, and allow you to choose the exact components you want for your budget and performance goals. It might seem daunting at first, with all the different parts and connectors, but with a little guidance, anyone can assemble their own gaming powerhouse. This comprehensive guide breaks down the process of building your first gaming PC into simple, step-by-step instructions, covering everything from planning your build to getting it up and running. Get ready to turn a box of components into a high-performance gaming machine!
Planning Your Build and Gathering Components
Before you start assembling, careful planning is essential.
Determine Your Budget: How much are you willing to spend? Your budget will heavily influence the performance level of your components.
Identify Your Performance Goals: What types of games do you want to play, and at what resolution and frame rate? This helps prioritize components like the graphics card (GPU) and processor (CPU).
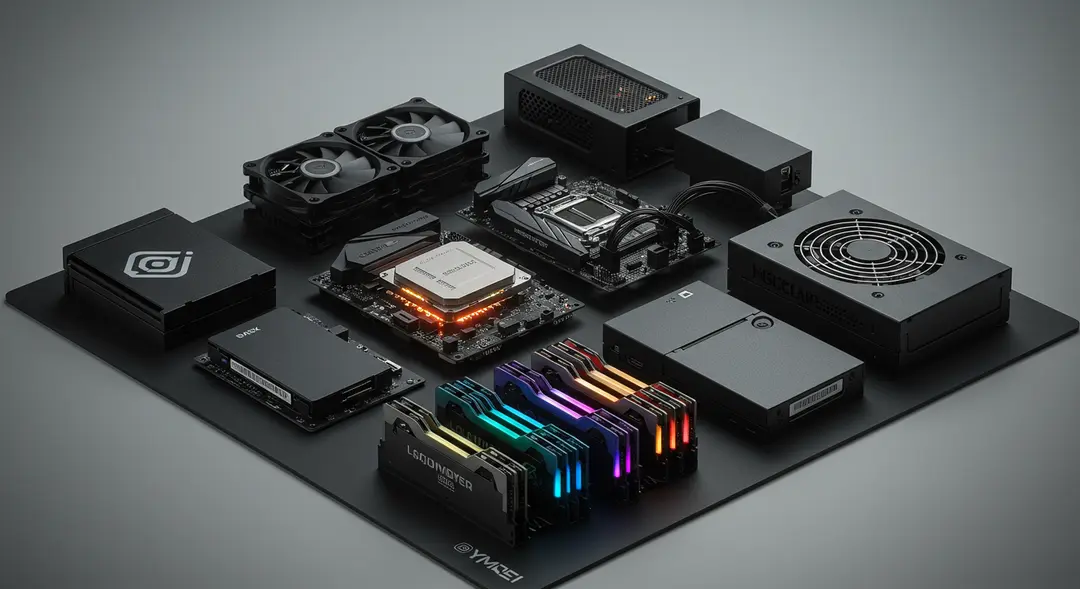
Choose Your Components: This is where you select the individual parts. The core components include:
CPU (Central Processing Unit): The brain of the PC. (Intel Core or AMD Ryzen)
Motherboard: Connects all the components. Ensure it's compatible with your chosen CPU.
GPU (Graphics Processing Unit): Crucial for rendering graphics in games.
RAM (Random Access Memory): Affects multitasking and game loading times. (Typically 16GB for gaming)
Storage (SSD or NVMe SSD): For installing your operating system, games, and files. SSDs are much faster than traditional Hard Drives (HDDs). NVMe SSDs are even faster.
PSU (Power Supply Unit): Provides power to all components. Ensure it has enough wattage for your build.
PC Case: Houses all your components. Choose one with good airflow and space for your parts.
CPU Cooler: Keeps your CPU from overheating. (Some CPUs include a stock cooler)
Use online resources and compatibility checkers (like PCPartPicker) to ensure all your chosen components are compatible before purchasing.
Core Assembly: CPU, RAM, and Motherboard Prep
With your components gathered, it's time to start building. Find a well-lit, clean, and static-free workspace (avoid carpet). It's recommended to use an anti-static wrist strap for safety.
Prepare the Motherboard: Place the motherboard on its anti-static bag on a flat, stable surface.
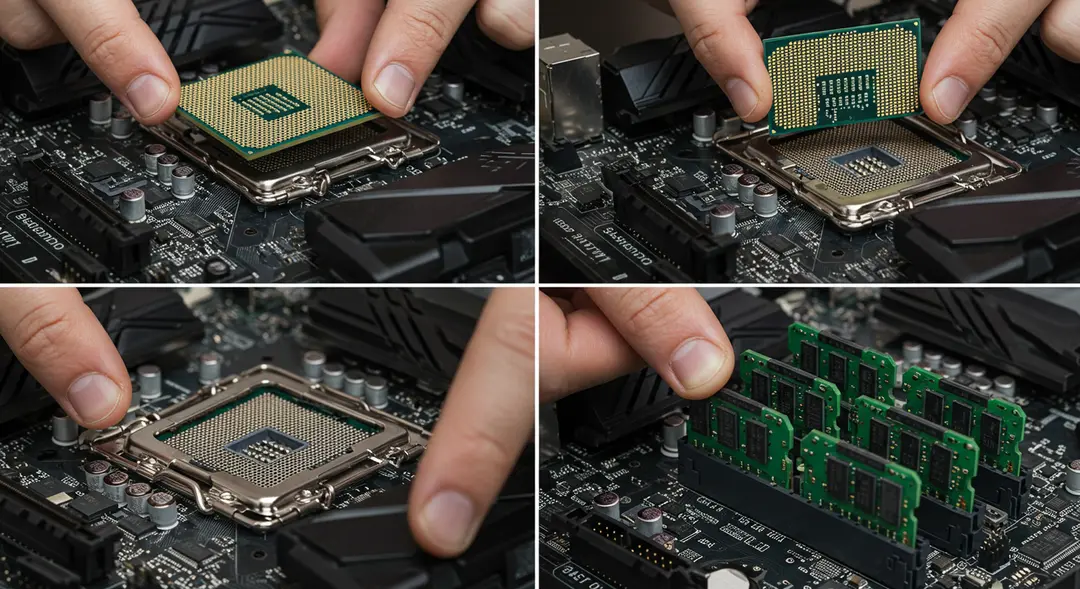
Install the CPU: Open the CPU socket lever on the motherboard. Carefully align the notches or arrows on the CPU with the socket and gently place the CPU in. Do NOT force it. Once seated, close the lever.
Install the CPU Cooler: If using an aftermarket cooler or a stock cooler that requires mounting, follow the cooler's instructions to attach it to the motherboard. This usually involves applying thermal paste (if not pre-applied) and securing the cooler. Connect the CPU cooler's fan cable to the "CPU_FAN" header on the motherboard.
Install the RAM: Open the clips on the RAM slots you intend to use (consult your motherboard manual for recommended slots, often spaced apart). Align the notch on the RAM stick with the notch in the slot and press firmly on both ends until the clips click into place.
Case Prep and Installing the Motherboard
Now, prepare your case and install the motherboard assembly.
Prepare the Case: Remove the side panels of your PC case. Install the motherboard standoffs in the case if they aren't pre-installed (check your motherboard manual for which holes to use based on your motherboard size). These raise the motherboard slightly to prevent short circuits.
Install the I/O Shield: This is the metal plate with cutouts for your motherboard's ports. Install it into the rectangular opening at the back of your case from the inside. Make sure it's oriented correctly.
Install the Motherboard: Carefully lower the motherboard assembly into the case, aligning the ports with the I/O shield and the screw holes with the standoffs. Gently press down until the standoffs fit through the holes.
Secure the Motherboard: Screw the motherboard into the standoffs using the screws provided with your case or motherboard. Do not overtighten.
Finishing Assembly: GPU, Storage, PSU, and Wiring
Almost there! Install the remaining components and connect everything.
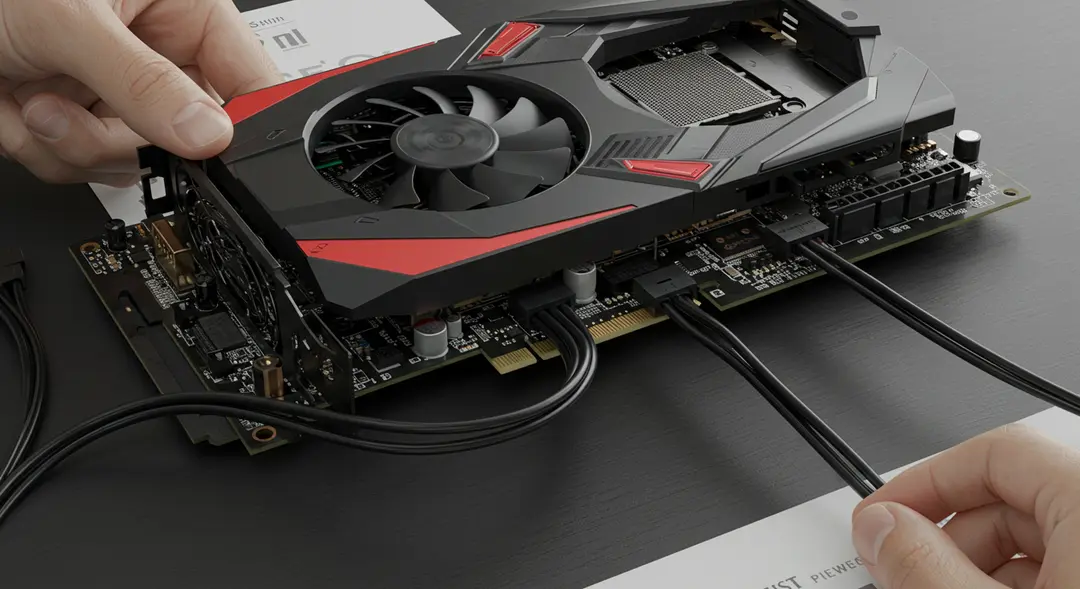
Install the GPU: Locate the PCIe slot on your motherboard (usually the longest one closest to the CPU). Remove the corresponding expansion slot covers from the back of your case. Align the GPU with the slot and press firmly until it clicks into place. Secure the GPU to the case with screws.
Install Storage Drives:
NVMe SSD: If you have an M.2 slot on your motherboard, insert the NVMe SSD at an angle and push down, then secure it with a small screw.
SATA SSD/HDD: Install 2.5-inch SSDs or 3.5-inch HDDs into the drive bays in your case. Connect a SATA data cable from the drive to a SATA port on your motherboard.
Install the PSU: Place the power supply unit into its designated bay in the case (usually at the bottom). Secure it with screws from the back of the case. If you have a modular PSU, connect the necessary cables to the PSU before installing it, based on the connectors needed for your components (motherboard, CPU, GPU, storage).
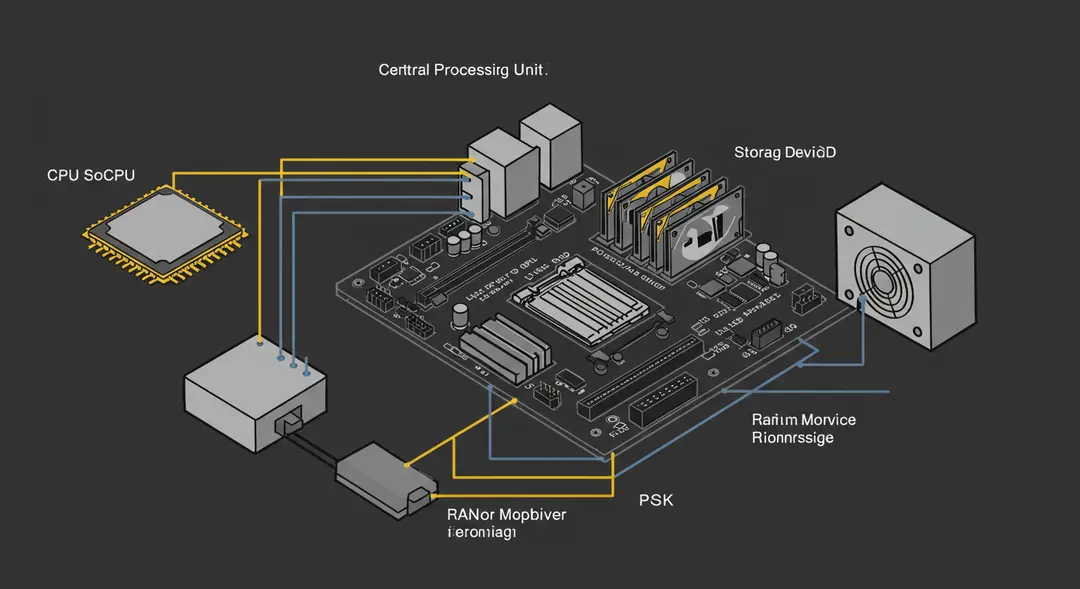
Connect Power Cables: Route the necessary power cables from the PSU to the corresponding connectors on your motherboard (24-pin ATX, 4/8-pin CPU), GPU (6-pin, 8-pin, or 12-pin PCIe), and storage drives (SATA power). Consult your component manuals for connector locations. Ensure all cables are firmly seated.
Connect Case Cables: Connect the small cables from your case's front panel (power button, reset button, USB ports, audio jacks, power/HDD activity LEDs) to the corresponding headers on your motherboard. Refer extensively to your motherboard manual for the correct pins.
Cable Management: Tidy up your cables using zip ties or Velcro straps, routing them behind the motherboard tray if your case allows. This improves airflow and makes the build look cleaner.
First Boot and Software Installation
The moment of truth!
Double-Check Connections: Before powering on, carefully review all connections to ensure everything is plugged in correctly and securely. Make sure no loose screws or components are rattling around inside the case.
Connect Peripherals: Connect your monitor (plug the video cable into the graphics card, not the motherboard unless you don't have a GPU), keyboard, and mouse to the ports on the back of the PC.
First Boot: Plug the power cable into the PSU and a wall outlet. Flip the switch on the back of the PSU to the "ON" (|) position. Press the power button on the front of your case.
Enter BIOS: If everything is connected correctly, your PC should power on, and you should see something on your monitor. Press the DEL or F2 key (or whatever key your motherboard manufacturer specifies) repeatedly during boot-up to enter the BIOS (Basic Input/Output System).
Configure BIOS (Optional but Recommended): In the BIOS, you can check if all your components are recognized (CPU, RAM, Storage). You might need to enable the correct RAM speed profile (like XMP or DOCP) and set the boot order to your USB drive or DVD drive for OS installation.
Install Operating System: Insert your bootable USB drive or DVD with your chosen operating system (like Windows). Restart the PC. The system should boot from the installation media. Follow the on-screen prompts to install the OS onto your primary storage drive.
Install Drivers and Updates: Once the OS is installed and you're on the desktop, install drivers for your motherboard, GPU, and other peripherals. Download the latest drivers from the manufacturers' websites. Run system updates.
Conclusion
Congratulations! You've successfully built your first gaming PC. This step-by-step process, from carefully selecting compatible components to the final wiring and initial setup, brings your custom machine to life. Building your own PC is not only a great way to get the performance you want for your budget but also provides valuable knowledge about how your computer works. With your new gaming rig ready, you can now dive into your favorite games with a machine tailored precisely to your needs. Enjoy the fruits of your labor and the world of PC gaming! What game will you play first on your new build?
Leave a Comment
Your email address will not be published.
4 Comments

Williams Thompson
May 3, 2025
Drones are getting so smart these days, I'm starting to feel like mine’s judging my driving from the sky. On a serious note though, amazing to see how far drone tech has come. Next stop: drone pizza delivery, I hope!
Williams Thompson
May 3, 2025
Drones are getting so smart these days, I'm starting to feel like mine’s judging my driving from the sky. On a serious note though, amazing to see how far drone tech has come. Next stop: drone pizza delivery, I hope!
Williams Thompson
May 3, 2025
Drones are getting so smart these days, I'm starting to feel like mine’s judging my driving from the sky. On a serious note though, amazing to see how far drone tech has come. Next stop: drone pizza delivery, I hope!
Williams Thompson
May 3, 2025
Drones are getting so smart these days, I'm starting to feel like mine’s judging my driving from the sky. On a serious note though, amazing to see how far drone tech has come. Next stop: drone pizza delivery, I hope!
Explore More Categories


Explore More Sub-Categories